
How Do You Know Where to Put Lights on Your Stage? (And When to Break the Rules!)
Jul 25, 2025Let’s dive into a foundational—but sometimes tricky—topic in stage lighting: Where should your lights go? More specifically, what angles should they come from to hit the stage, and how should you approach your stage lighting to get the look you’re going for?
We’ll start with the classic rule of thumb, but also explore when and why you might want to bend (or even break) those rules for better results.
The Classic 45° Rule for Stage Lighting
If you’ve followed Learn Stage Lighting for a while, you’ve probably heard this:
“Place your lights about 45° up and 45° out from the subject on stage.”
See my fancy diagram:
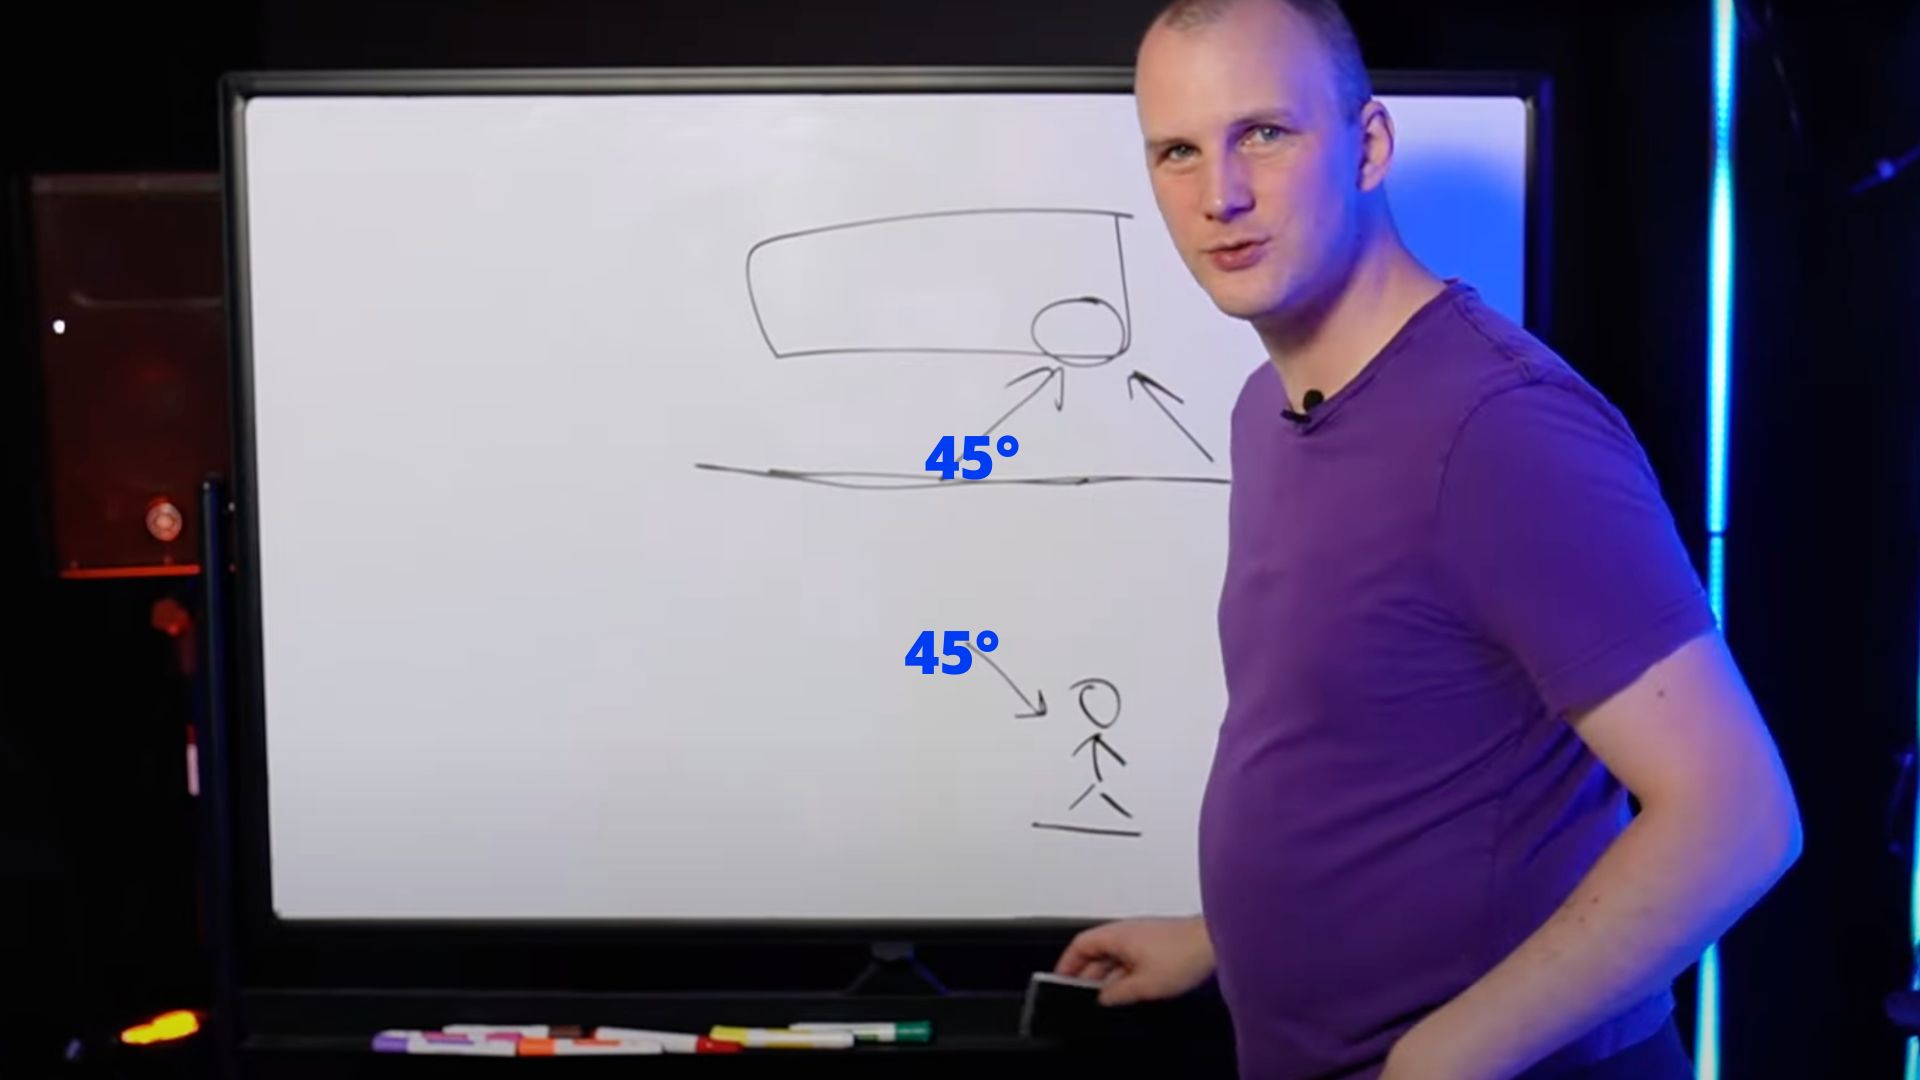
From an overhead view, this means placing lights on a pipe or truss to hit the stage at 45° up and then repeat to cover the different zones of your stage. From a front view, these lights are typically hung 45° above the performers as well. Done right, this gives you:
- Even, clean coverage
- Natural-looking shadows
- A consistent look across your stage
This method is tried and true, and it works great for a full-stage wash in many situations. We even made a video about creating an awesome, even stage wash.
But... Is 45° Always Ideal?
Short answer: Not always.
While 45° is a solid starting point, there are some very real reasons you might not want to stick to it, especially in modern venues.
Wide Rooms or Fan-Shaped Seating
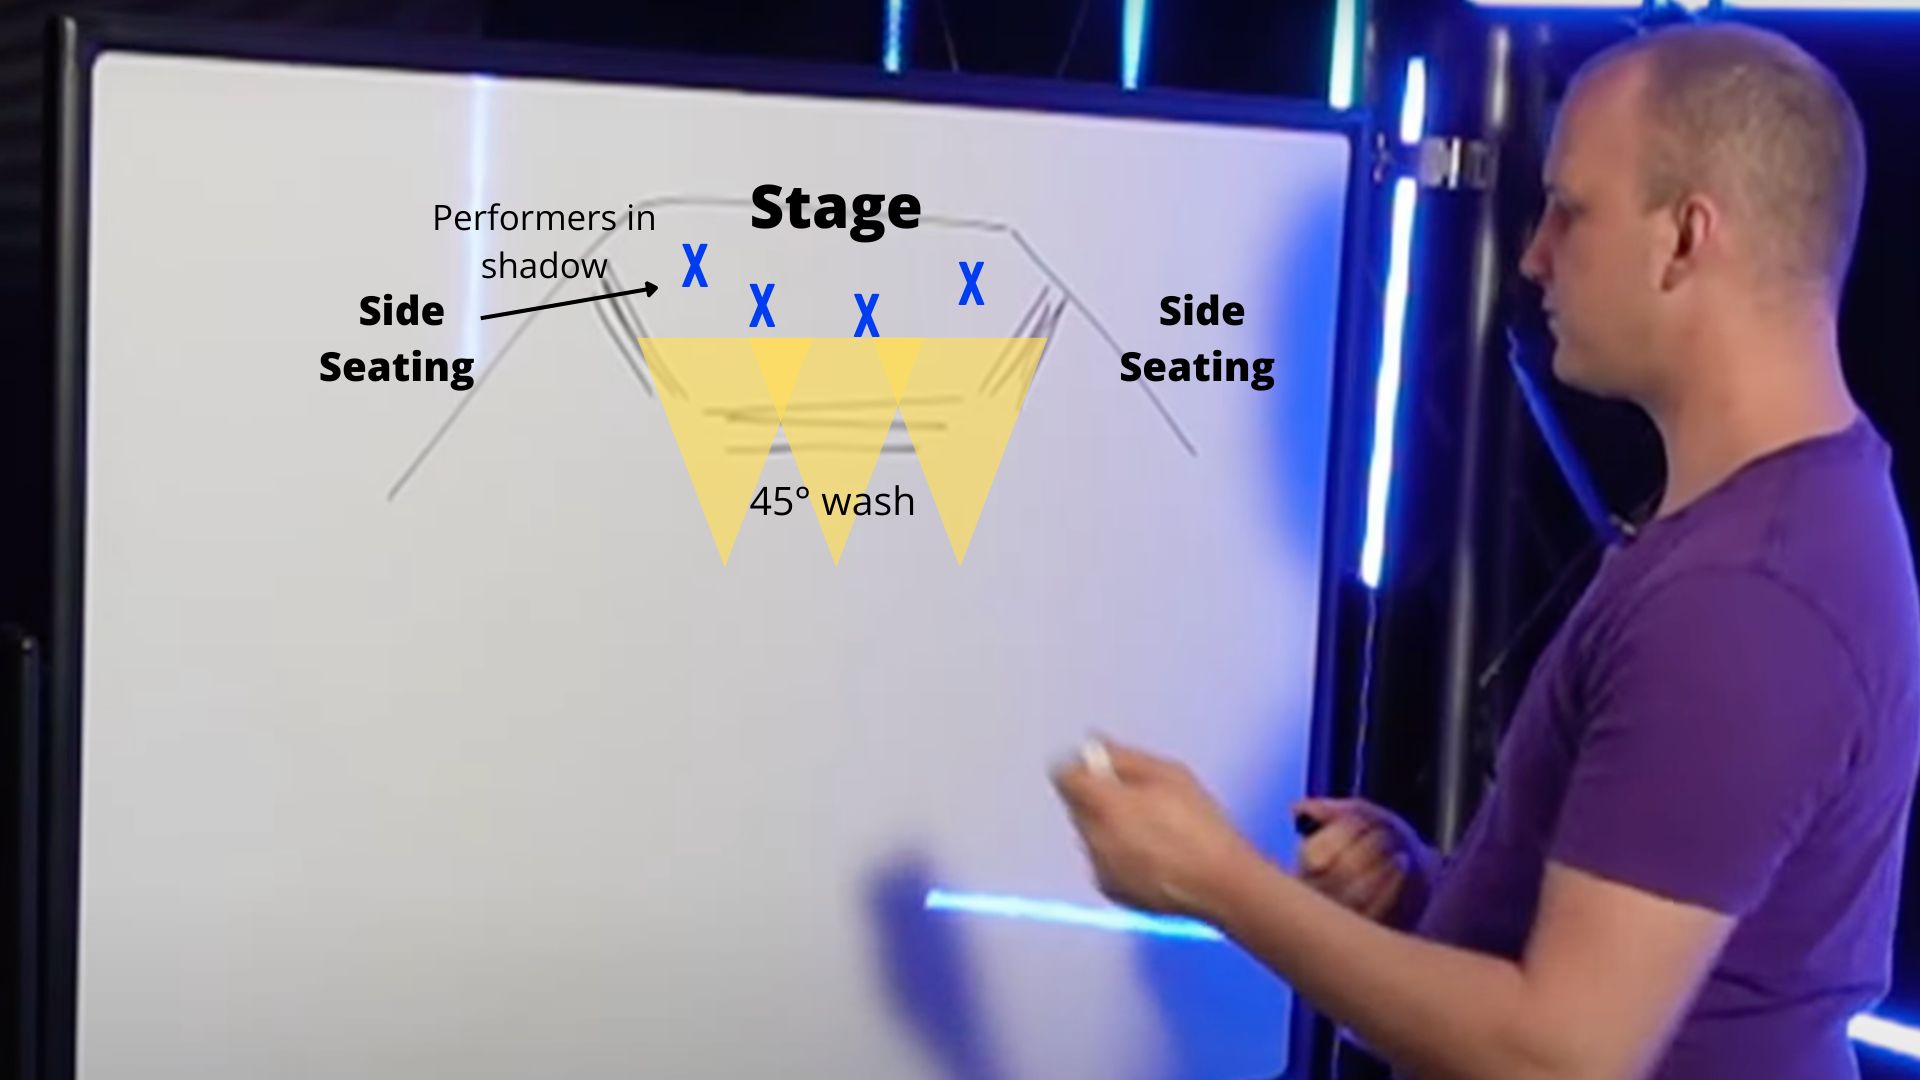
Many churches, for example, have wide fan-shaped auditoriums. If your lights are only at 45° from the center, people sitting off to the far sides may see performers in shadow—or only partially lit. That’s a problem!
Dramatic Lighting for Music and Performance
On classic rectangular stages, doing a 45° wash creates essentially a big rectangle of light. For bands, concerts, or performances that prioritize visual impact, a full white wash can be boring. It might:
- Wash out backlight and set elements (anywhere there’s extra front light, the backlight becomes less vivid)
- Diminish contrast and mood
- Cause unflattering light spill and floor bounce
Alternatives to Traditional 45° Lighting
Let’s explore a few alternatives you can implement to improve both the look and the flexibility of your lighting setup:
Lower the Front Light Angle
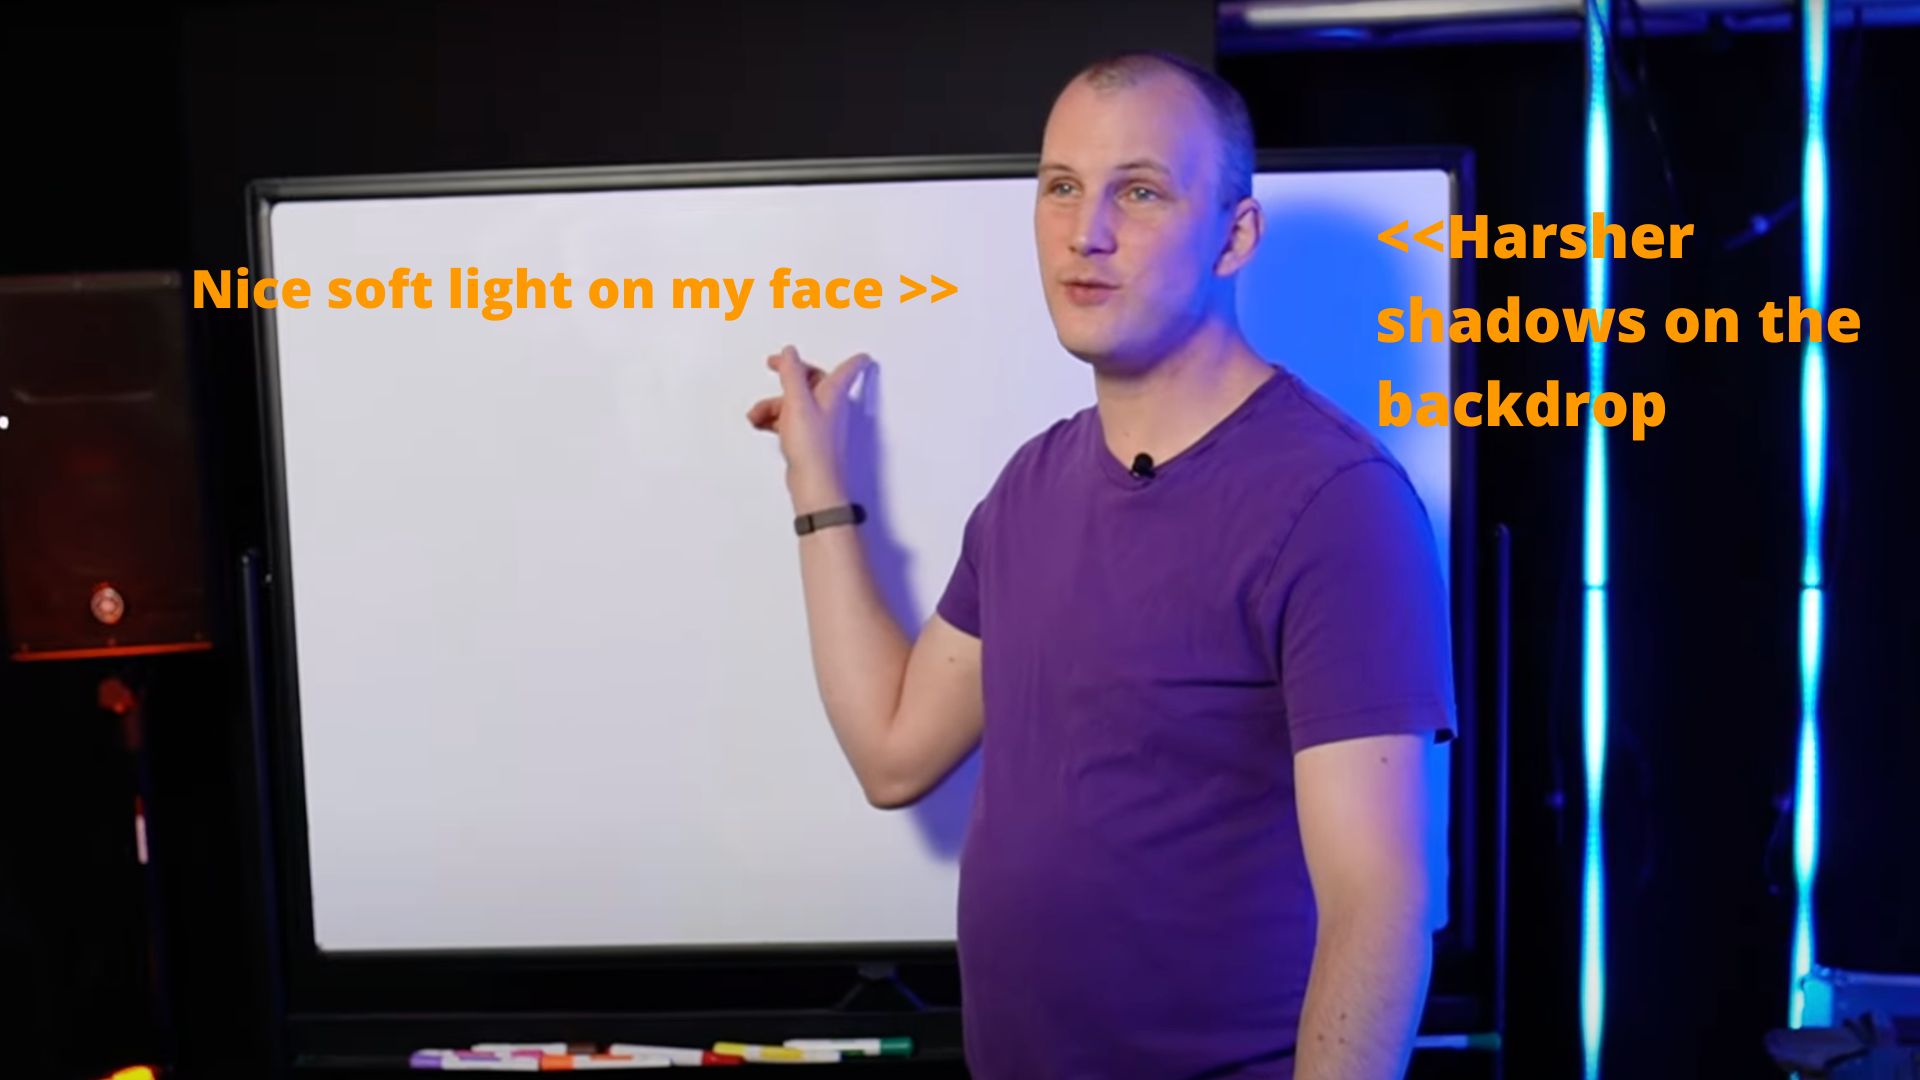
If you're filming or using close-up shots (especially for IMAG or livestreams), lowering your front lights from 45° to around 22° can reduce harsh shadows under the eyes and chin.
Pro: More flattering on-camera look
Con: Shadows may hit your backdrop, and lights can feel more blinding to the presenter as they look at the audience.
Tip: If going lower, use softer light sources to make the light more pleasing.
How the light sits on the performers’ faces matters more when you’re doing a lot of video and close-up shots. Lighting for wide shots or just for people in the room is a bit different. Like theater makeup looks really heavy close up, but when you’re 20, 50, 100 feet or more away, it looks amazing, right? Lighting is similar, and it’s a balance.
Widen the Side-to-Side Angle
If you find that the 45° side-to-side setup is creating unwanted shadow falling on your backdrop, you can also try going wider. You can widen your light angles—going out to 60°, 90°, or even 120° apart—as long as:
- You balance lighting from both sides
- You aim and overlap lights properly
This helps:
- Improve coverage for wide seating areas
- Reduce backdrop shadows
- Maintain even lighting on faces
It’s a little trickier to aim consistently across stage zones, but it’s totally doable—and often worth it.
Use Dual Backlights (Left and Right)
If your audience or camera setup includes extreme side angles, consider adding two backlights—one from the left and one from the right. This ensures:
- Better visibility from all angles
- A consistent look even when the performer turns or moves
- Enhanced contrast and subject separation
This also helps when using cameras at varied angles around the room.
Full Wash vs. Individual Spots
Let’s talk about when to use a stage-wide wash and when to light with individual zones or spots.
Use a Full Stage Wash When:
- People move freely across the stage
- You’re lighting speeches, sermons, comedy, or conference-type events
- Even visibility is your main goal
You’ll want to break the stage into zones (typically 8–10 feet wide) and light each one from both sides at your chosen angles.
Use Individual Spots When:
-
You want more drama and less spill
-
The performers stay mostly in fixed positions
-
You're lighting a band or musical performance
Instead of a wide wash, place tight beams or spots on each musician or singer. Let the space between them go dark or be lit only by color and effects lighting. You may often see a follow spot on the lead performer as well, to make sure they’re always lit. This gives you:
- More mood and contrast
- Stronger backlight and set design impact
- Greater control over shadows
What If You Need Both?
Let’s say you’re lighting a church service, with both:
- A sermon, announcement time, or similar that needs even, wide front lighting
- Worship music that calls for dramatic looks
You’ve got options!
Use Moving Front Lights
With moving heads, you can:
- Zoom wide for preaching
- Zoom narrow and reposition for music
- Transition between modes during a video or prayer
Even if you don’t have multiple fixture sets, you can re-aim the same lights to handle both duties with a bit of programming.
Use Color to Set the Mood
If a performer isn’t actively addressing the audience, you don’t have to front light them in white. Use:
- Color washes
- Side lighting
- Backlighting only
Think creatively especially about lighting people on stage who aren’t “in the spotlight”. This keeps your stage looking dynamic while still maintaining visibility.
Lighting Is Balance
Lighting is always a balance between visibility, creativity, and practicality. What works in one room may not work in another.
Key takeaways:
- 45° is a great place to start—but it’s not sacred
- Adapt based on your room shape, camera use, and audience needs
- Use lower and wider angles to reduce shadows or improve coverage
- Don’t be afraid of individual spots, backlight, or color-only zones
Need Help with Your Lighting Design?
If you're planning an install or updating your setup, the team at Above AVL would love to help.
We can evaluate your space, recommend the right fixtures, and help with design, layout, and even installations so you can get the right audio, video, and lighting for YOUR stage. It’s our passion! Contact us here to learn more and begin finding the RIGHT lighting for your space!
3 Mistakes You're Making When Purchasing Lighting, Audio or Video Gear:
You are most likely making these 3 mistakes which cause you to overspend, get the wrong gear, and end up frustrated. Grab our free guide to solve it:
